1、设置系统环境
① 关闭防火墙。
CentOS 6.X/Redhat 6.X
service iptables stop
service ip6tables stop
chkconfig iptables off
chkconfig ip6tables off
CentOS 7.X/Redhat 7.X
# 临时关闭防火墙(立即生效)
systemctl stop firewalld
# 永久关闭防火墙(重启后生效)
systemctl disable firewalld
# 查看防火墙状态
systemctl status firewalld
②关闭Selinux
#临时关闭selinux
setenforce 0
#永久关闭Selinux,需要重启服务器生效
sed -i 's/=enforcing/=disabled/g'  /etc/selinux/config
2、安装Smartbi-UnionServe
上传SmartbiUnionServer.tar.gz到服务器,并解压到/opt目录。
tar -zxvf SmartbiUnionServer.tar.gz -C /opt
3、 修改配置文件
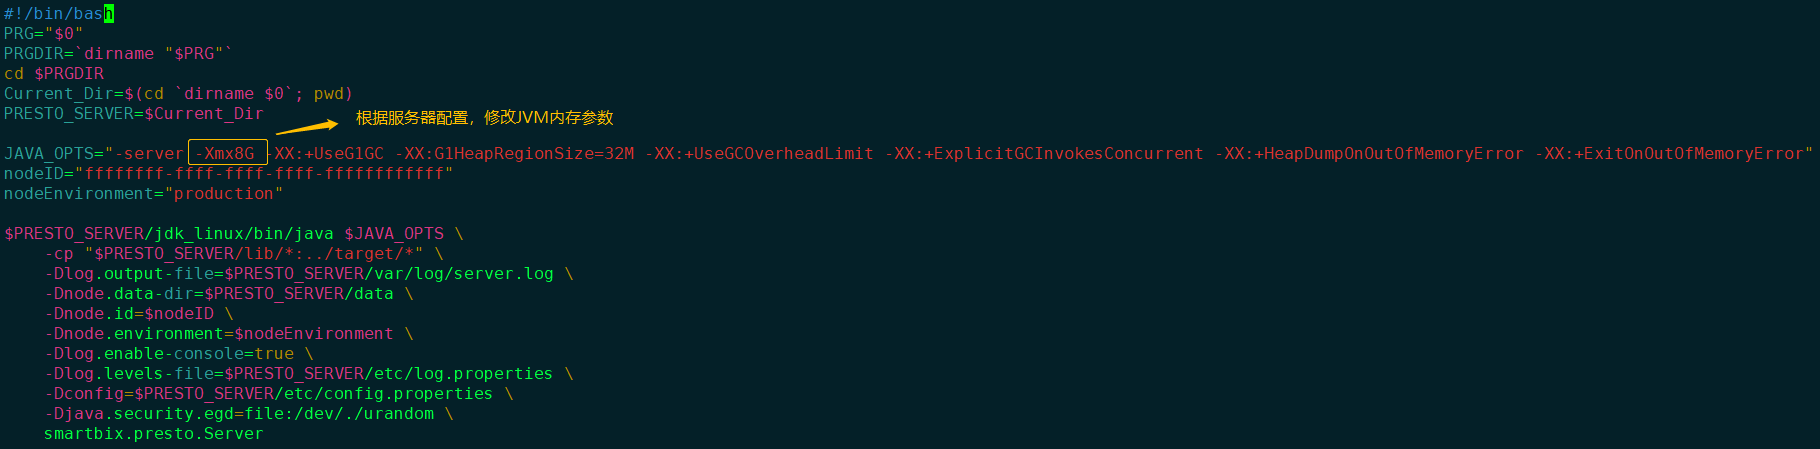
1)JVM配置
通过修改启动文件可以设置JVM的最大内存、GC等参数。
cd /opt/SmartbiUnionServer
在启动服务之前,需要根据服务器的实际物理内存大小,修改JVM的默认最大内存,如下:
修改run.sh中的-Xmx参数,默认的最大内存值为8G,可根据服务器实际配置进行情况填写:
2)参数配置
参数配置文件放在/opt/SmartbiUnionServer/etc目录下,需要修改config.properties。
config.properties的基本配置信息如下:
coordinator=true
node-scheduler.include-coordinator=true
http-server.http.port=48080
query.max-memory=2GB
query.max-memory-per-node=1GB
discovery-server.enabled=true
discovery.uri=http://0.0.0.0:48080
参数说明如下:
配置项 | 说明 |
http-server.http.port | 设置presto的端口,默认为48080,启动时如果端口冲突,需要修改。 |
query.max-memory | 设置单条查询语句最大使用内存,默认为2GB。 |
query.max-memory-per-node | 设置单条查询语句在每个节点上的最大使用内存,默认为1GB。 |
discovery.uri | 设置Smartbi UnionServer的url,默认为http://0.0.0.0:48080,其中0.0.0.0表示本机地址,48080表示端口,必须与http-server.http.port保持一致。 |
3)日志级别配置
日志级别配置文件放在/opt/SmartbiUnionServer/etc目录下log.propertes,默认日志级别为INFO。
com.facebook.presto=INFO
日志级别可以选择:DEBUG、INFO、WARN和ERROR,其中DEBUG的日志级别最高,输出的日志最多,ERROR的日志级别最低,输出的日志最少。
4、运维操作
4.1、启动Smartbi-UnionServer
赋予启动脚本可执行权限
cd /opt/SmartbiUnionServer
chmod +x run.sh
给jdk赋予可执行权限:
chmod +x -R jdk_linux/
启动SmartbiUnionServer服务有两种方式:
# 前端启动方式,日志信息直接打印在屏幕上,多用于调试
sh run.sh

# 后台启动方式,启动日志存放在var/log/server.log
nohup ./run.sh > /dev/null 2>&1 &
使用前端方式启动presto时,当看到屏幕打印信息:
======== SERVER STARTED ========,说明服务启动成功。

如果提示Address already in use,说明端口冲突了,需要修改/opt/SmartbiUnionServer/etc/config.properties里的端口,然后重启SmartbiUnionServer。

使用后台方式启动SmartbiUnionServer时,如果使用后台启动,可以使用ps -ef | grep SmartbiUnionServer查看SmartbiUnionServer进程是否存在,如果存在,则启动成功。如下图所示。

如果进程不存在,可以查看/opt/SmartbiUnionServer/var/log/server.log,查看报错信息。如果提示Address already in use,说明端口冲突了,需要修改/opt/SmartbiUnionServer/etc/config.properties里的端口,然后重启presto。
4.2、停止SmartbiUnionServer
通过命令:ps -ef | grep SmartbiUnionServer
查到SmartbiUnionserver的进程号:

然后使用kill -9 <进程号>命令杀掉SmartbiUnionserver进程。
4.3、设置开机启动
Linux部署SmartbiUnionServer开机启动设置方式:
4.3.1方法一:
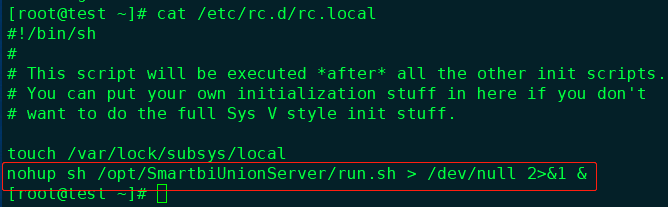
Centos6.x
①赋予脚本可执行权限(/opt/SmartbiUnionServer/run.sh是SmartbiUnionServer的脚本路径)
chmod +x /opt/SmartbiUnionServer/run.sh
②在/etc/rc.d/rc.local文件末尾增加添加SmartbiUnionServer的脚本启动命令,保存退出
vi /etc/rc.d/rc.local
#添加以下启动命令
nohup sh /opt/SmartbiUnionServer/run.sh > /dev/null 2>&1 &

Centos7.x
① 赋予脚本可执行权限(/opt/SmartbiUnionServer/run.sh是SmartbiUnionServer的脚本路径)
chmod +x /opt/SmartbiUnionServer/run.sh
② 在/etc/rc.d/rc.local文件末尾增加添加SmartbiUnionServer的脚本启动命令,保存退出
vi /etc/rc.d/rc.local
#添加以下启动命令
nohup sh /opt/SmartbiUnionServer/run.sh > /dev/null 2>&1 &
③ 在centos7中,/etc/rc.d/rc.local的权限被降低了,所以需要执行如下命令赋予其可执行权限
chmod +x /etc/rc.d/rc.local
Suse12
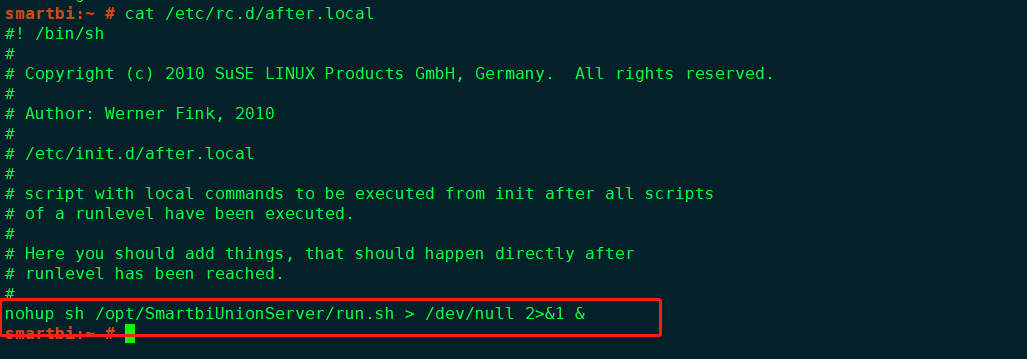
① 赋予脚本可执行权限(/opt/SmartbiUnionServer/run.sh是SmartbiUnionServer的脚本路径)
chmod +x /opt/SmartbiUnionServer/run.sh
② 在/etc/rc.d/after.local文件末尾增加添加SmartbiUnionServer的脚本启动命令,保存退出
vi /etc/rc.d/after.local
#添加以下启动命令
nohup sh /opt/SmartbiUnionServer/run.sh > /dev/null 2>&1 &
③ 给/etc/rc.d/after.local添加执行权限
chmod +x /etc/rc.d/after.local
4.3.2 方法二
进入/etc/init.d目录,创建unionserver启动配置文件
vi /etc/init.d/unionserver
配置参考如下:
#!/bin/bash
# chkconfig: 345 80 20
# description: start the unionserver deamon
#
# Source function library
. /etc/rc.d/init.d/functions

prog=unionserver
UNIONSERVER_HOME=/home/smartbi/SmartbiUnionServer/  #注意替换成实际的smartbi unionserver路径
export UNIONSERVER_HOME

case "$1" in
start)
    echo "Starting unionserver..."
    $UNIONSERVER_HOME/run.sh &
    ;;

stop)
    echo "Stopping unionserver..."
    kill -9 $(ps -ef | grep SmartbiUnionServer | grep jdk_linux | awk '{print $2}')
    ;;

restart)
    echo "Stopping unionserver..."
    kill -9 $(ps -ef | grep SmartbiUnionServer | grep jdk_linux | awk '{print $2}')
    sleep 2
    echo
    echo "Starting unionserver..."
    $UNIONSERVER_HOME/run.sh &
    ;;

*)
    echo "Usage: $prog {start|stop|restart}"
    ;;
esac
exit 0
设置开机启动
chmod +x /etc/init.d/unionserver    #添加执行权限
chkconfig unionserver on            #添加到开机启动
chkconfig --list                    #查看开机启动服务列表
5、日志文件
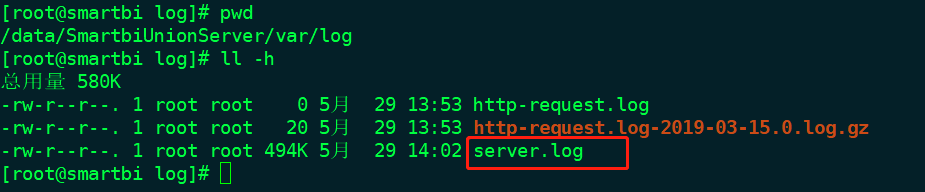
SmartbiUnionServer 的日志路径:<SmartbiUnionServer >/var/log/server.log。
如果出现启动失败时,可以通过分析日志来判断问题点。
6、版本更新
1)停止现有的SmartbiUnionServer服务:
# ps -ef| grep SmartbiUnionServer
# kill -9 进程id
2)升级
① 备份原来的SmartbiUnionServer/plugin目录
# mv plugin pluin_back
复制解压出来的新版SmartbiUnionServer/plugin到原来的目录文件
# cp -r <SmartbiUnionServer新版本>/plugin <SmartbiUnionServer旧版本>/plugin
② 备份原来的SmartbiUnionServer/lib目录
# mv lib lib_back
复制解压出来的新版SmartbiUnionServer/lib到原来的目录文件
# cp -r <SmartbiUnionServer新版本>/lib <SmartbiUnionServer旧版本>/lib
③ 复制SmartbiUnionServer/etc/queue_config.json 到etc目录
# cp -r <SmartbiUnionServer新版本>/etc/queue_config.json <SmartbiUnionServer旧版本>/etc/
④ 复制SmartbiUnionServer/etc/resource-groups.properties 到etc目录
# cp -r <SmartbiUnionServer新版本>/etc/resource-groups.properties <SmartbiUnionServer旧版本>/etc/
3)启动
# nohup ./run.sh &
4)测试验证
使用 Smartbi 连接跨库联合数据源验证,详情请参考 跨库联合数据源。